Logging into Back Office/ WebAdmin
To make it as secure & easy as possible, we provide a 2-factor Login that works just like you login to your bank account. Enter your mobile number and we send you a PIN to login.
Simply use a google Chrome browser to go to the Web Admin Login
Step 1: Enter your mobile number and press "Continue"
Step 2: Enter 5 digit Token you received by SMS
Step 3: You are now at the account selector page.

From here you can choose from a single location, or - if you have access rights - edit HQ level details.
Setting Up Credit Card Payment Processor using Magtek Readers
1. Magtek Reader Payment Configuration
With any new system please reach out to your customer success representative and begin the application for payment processing using Magtek Readers
Important: Payments need to be configured for each individual store separately!
In the Web Admin (store level): https://c1.tchpt.com/admin/
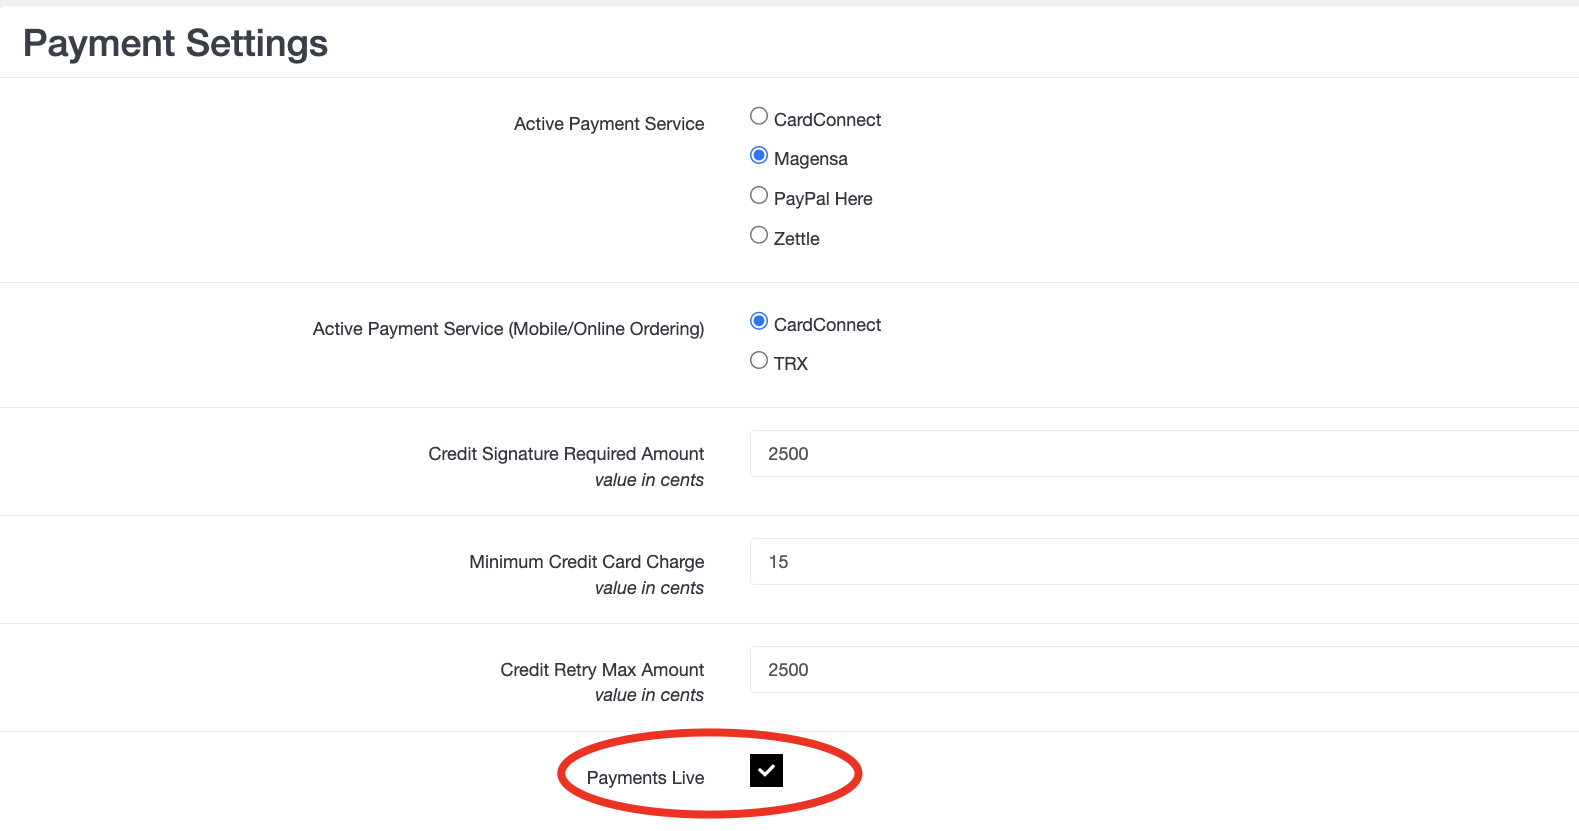
Navigate to Operations > Payments > Payment Settings
Enable Magensa Payments, and if you have online ordering choose the correct processor of Card Connect or TRX.
Most times this will already be completed.

Checkmark Payments Live
Adding Employees
The Basic idea: After setting up job titles, you can now add your employee details including pay rate and mobile number for easy PIN recovery.
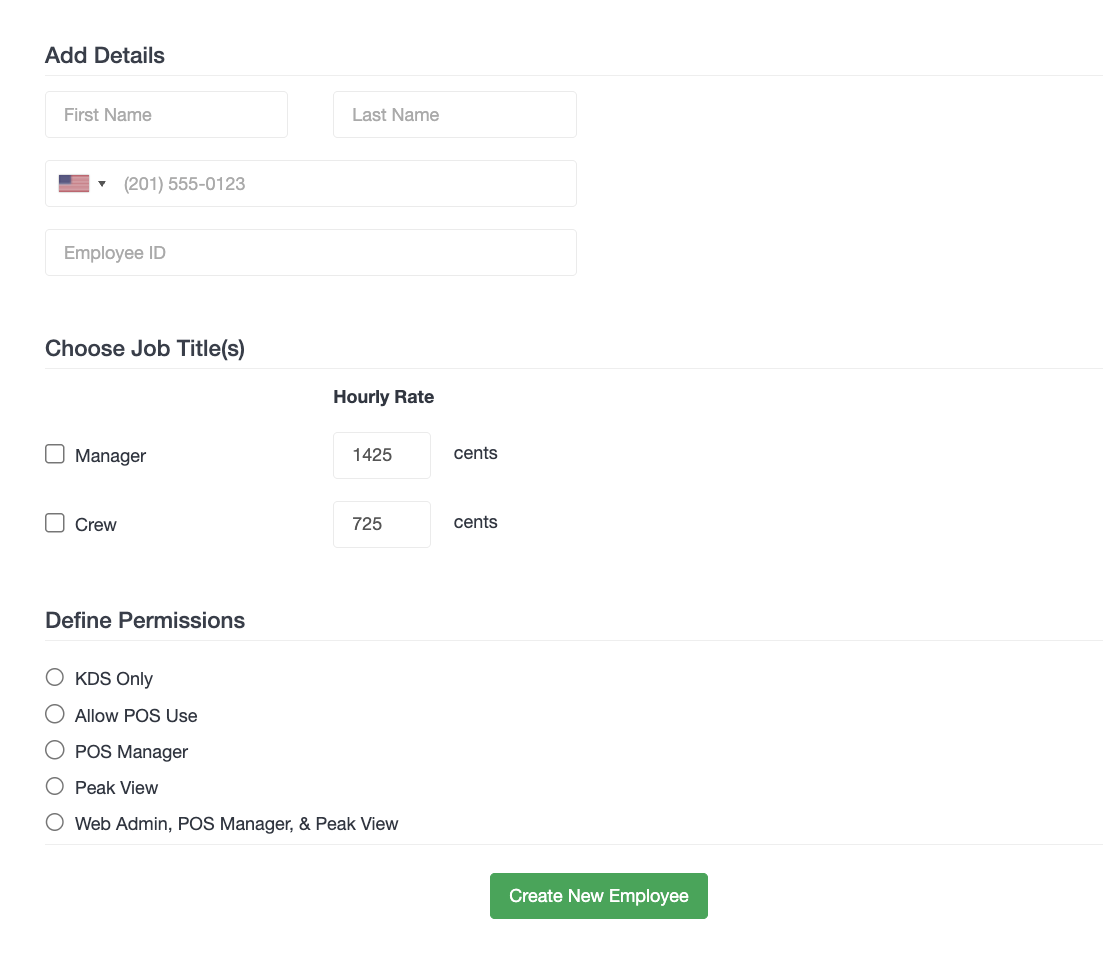
1) Go to Operations > Employees > Add Employees.
2) Choose one or many Job Titles. This is also used to calculate pay for hours.
3) Define Permissions:
- KDS Only: Can operate only in Pick Up or Prep Station
- Allow POS Use: Can operate in all roles on POS tablet, e.g. Cashier and work with registers.
- POS Manager: Full POS Permissions, e.g. gives access to Manager functions on POS such as clocking out other employees or adjusting time clocks.
- Peak View: They only have access to use the PEAK app and view the reporting details.
- Web Admin and POS Manager: Can Access Manager functions on POS and this Web Admin
Edit employee Settings
Operations > Employees > Employees > click on current employee
More Options
Pin code for login Can access manager functions on POS tablet. Note, PIN codes are automatically assigned.
Don’t forget to save your changes!
Configuring Sales Taxes
You are responsible for setting up and maintaining the appropriate sales taxes for your locations. Watch the video and learn how to configure taxes.
Tip:
If the tax applies to all stores, configure it in WebAdmin on HQ level once and sync it to all stores.
But, if it's a tax that applies to just one or some stores, e.g. California litter tax that just applies to your stores in California, configure it in WebAdmin on store level individually only for those stores that are affected by the tax.
Configuring Order & Item Taxes, 00:47 min
Configuring Order & Item Tax
Web Admin (HQ or local store level) > Operations > Profile > Order Taxes
1. Add a new tax by clicking "Add New Tax"
2. Setting up an order tax
- Name & Description: Give the Tax a name.
- Rate: What is the tax amount in precent? Note that 8.5 = 8.5%
- Value added: Also called "Tax Inclusive".
Check this box if you want the customer prices to include this tax rate and not be added separately to the bill
- Service Types: Defines wether a tax is included to a certain service type. E.g. Dine-In requires a specific tax
- Item Types: Define if a tax is only added to a certain item type. E.g Liquor tax
- Forced items: Choose any item from your menu that requires a specific tax
Job Titles
The Basic Idea is to first create a Job Title (with pay rate) for employees, then add employees with their pay rate and mobile telephone number.
Go to Operations > Job Titles > Add Job Title
Add the Jobs name, e.g Barista and set the default wage in cents per hour.
Tip: pay rate is in cents. So $9.75/hr is 975 cents

Adding/Editing Registers
The Basic Idea: Registers are pre-defined but you can add and edit them here. Use edit register to change the name of registers and select receipt auto-print preferences and the colors shown on the KDS.
Manage your registers from local stores Web Admin > Equipment > Registers
Your stand is preconfigured with registers. If a register needs to be replaced or an additional register is needed e.g. a Linebuster, learn here how to add and configure it.
Add Register
Enter a name and click Add Register. Find the new register at the bottom of the Registers list below.

Edit Register
Check Drive Thru to hide on POS the buttons to select walk in / to go / delivery.
Select a Swiper Type for your register.
Receipt Printer
Select a printer, set up in Equipment > Printers.
Auto Print
A receipt when a payment is collected, a drawer Report on end drawer, or when a hot swapped drawer's count is finalized.
KDS Colors
Help Baristas recognize at a glance which register sent the order.
Don't forget to Save your changes.

Configuring Discounts
The Basic Idea: HQ will have pre-configured discounts to use. Follow these steps If you would like to add additional discounts of your own.
Note:
Configure global discounts on HQ Web Admin level.
Configure discounts applying only to individual stores, for each store separately in their Web Admin.
Note: you can add discounts to items or orders. This example explains how to add a new Item Discount and how to re-arrange the order on the POS Discount view.
1. Go to Promotions > Item Discounts (or Order Discounts) and click +Add Discount

2. Enter Discount Name and choose discount Type
There are three discount types to choose from:
- Amount
- Percent
- Target Price

Creating Target Discount
Set a fixed price for any item by defining a target price. Note that 200 = $2.00 , which means, each item is now priced at $2.00
Creating Amount Discount
This means an item price gets reduced by the amount you enter here. Note that 100 = $1.00
Creating Percentage Discount
Defining a percentage allows you to reduce the item price by the percentage you configure. Note that 500 = 50 %
3. Change listing of discounts
By Drag and Drop, you can re-arrange the listing of your discounts by click and hold on the arrows on the left side.

Configuring Email Reports
The Basic Idea: Receive sales summary reports to your email for any day-parts you choose. Set up multiple reports for a day.

Load the local stores Web Admin page > Reports and Stats > Email Reports
Add here email address and define schedules by giving them a name and setting a start & end time.
Add Email Addresses
Add and save as many email addresses as you want, that should receive automatically sent Email reports.
Add Schedule
Create Schedules for your shifts or periods of interest. Give the schedule a Name, define Start and End
Time and tab ‘Add Schedule’.
When a schedules end time is reached, a report is sent to the defined addresses.

Was this article helpful?
That’s Great!
Thank you for your feedback
Sorry! We couldn't be helpful
Thank you for your feedback
Feedback sent
We appreciate your effort and will try to fix the article