Prep stations are used to route specific items to different KDS stations or printers.
In the first example we are creating the "drinks" prep stations and assigning bottled water to that prep station. Then we will exclude the drinks prep station from our food prep KDS.
By doing this the food prep KDS will not display the item bottled water. A separate KDS can be set-up to display all ordered items.
In the second example we are creating the "food" prep station and configuring auto print of a ticket when orders hit that KDS
Overview - Example 1
Prep stations can be used to exclude items from a KDS.
- Create one or more prep stations, e.g. drinks, food, merchandise
- Assign items to a specific prep stations
- Sync the menu
- Configure KDS to exclude prep station(s)
1. Create a Prep Stations
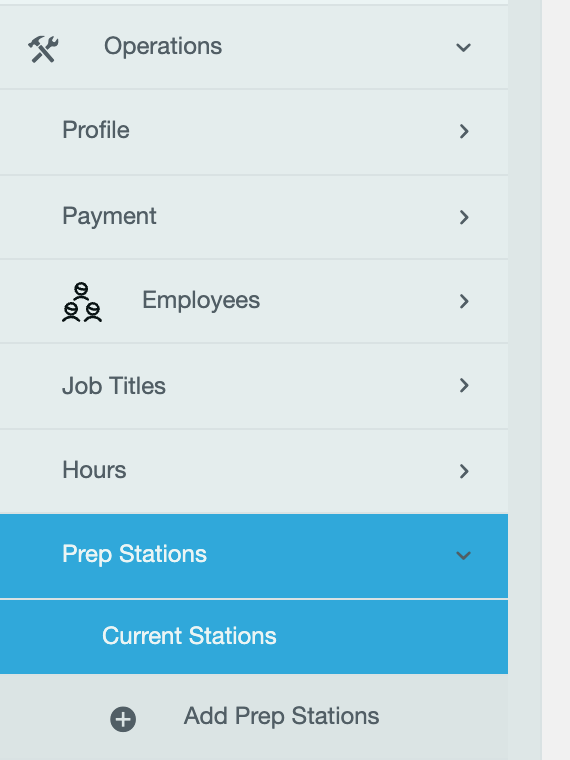
Navigate to the HQ level of the Touchpoint Web Admin to create prep stations. Remember, all future stores will be built with this configuration but for any existing stores you will also need to create these prep stations at each store.
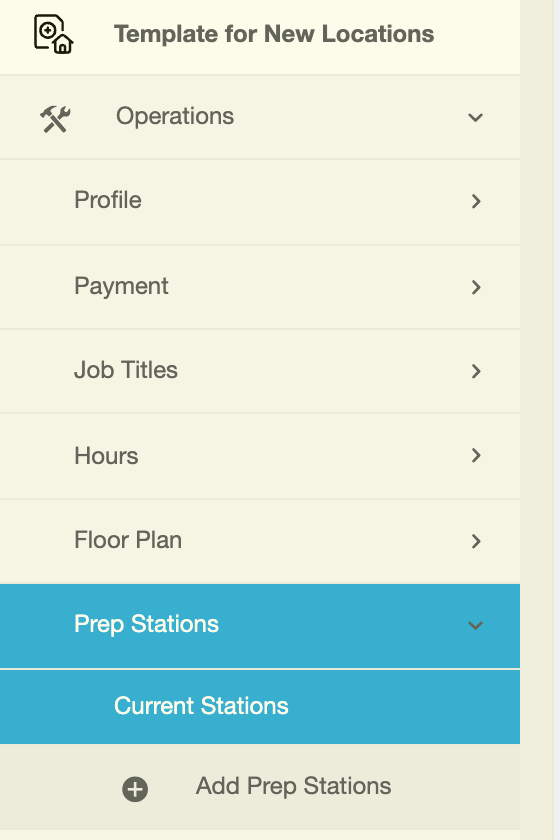
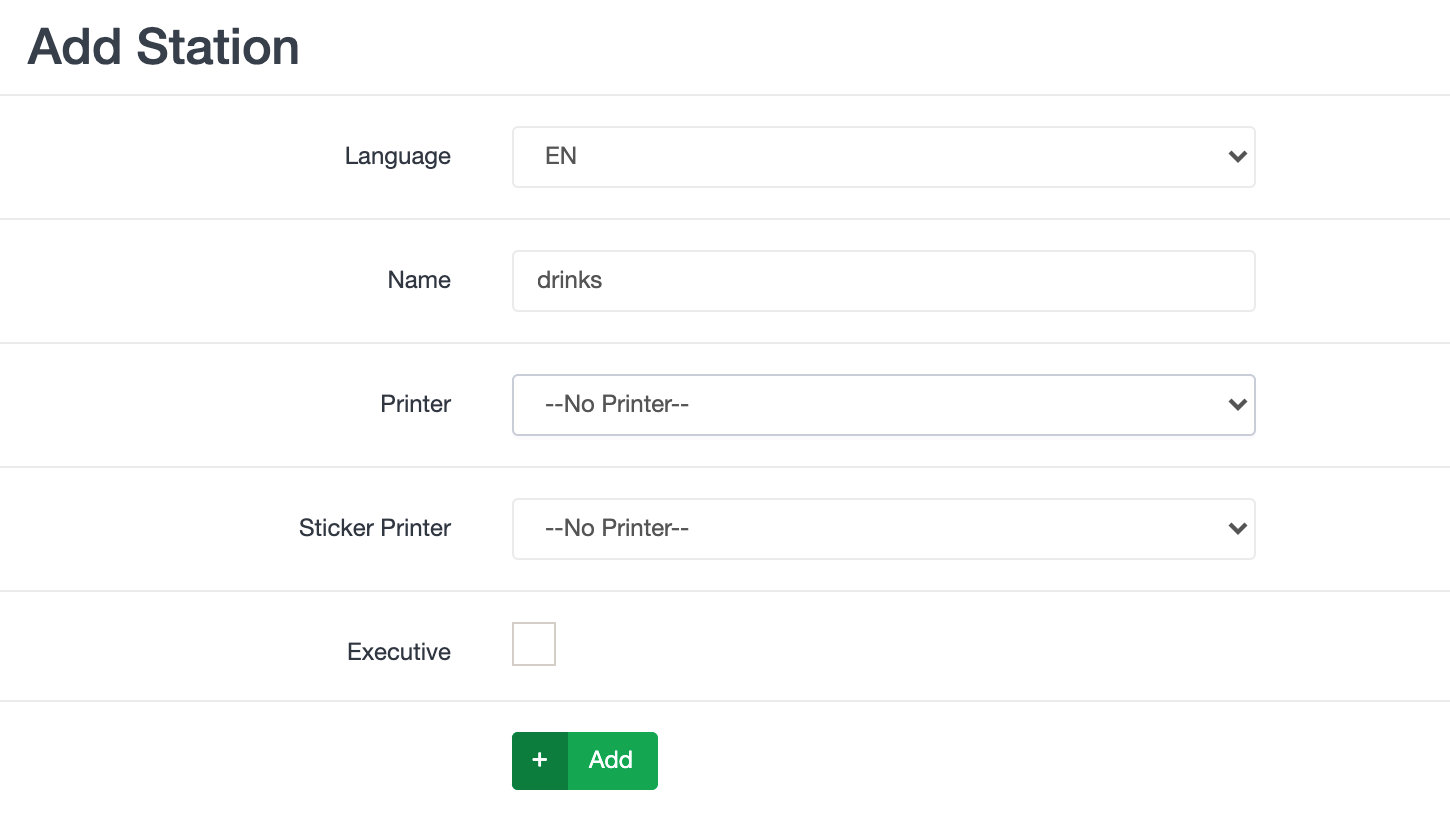
Click on Add Prep Stations, then enter the station name and click Add
You will need to do this at the HQ level and at the store level for stores that are already live.
2. Assign Items to Specific Prep Stations
In this example we are setting an item to go to the drinks prep station. Remember to do this from the HQ Web Admin so you can sync it to all of your locations.

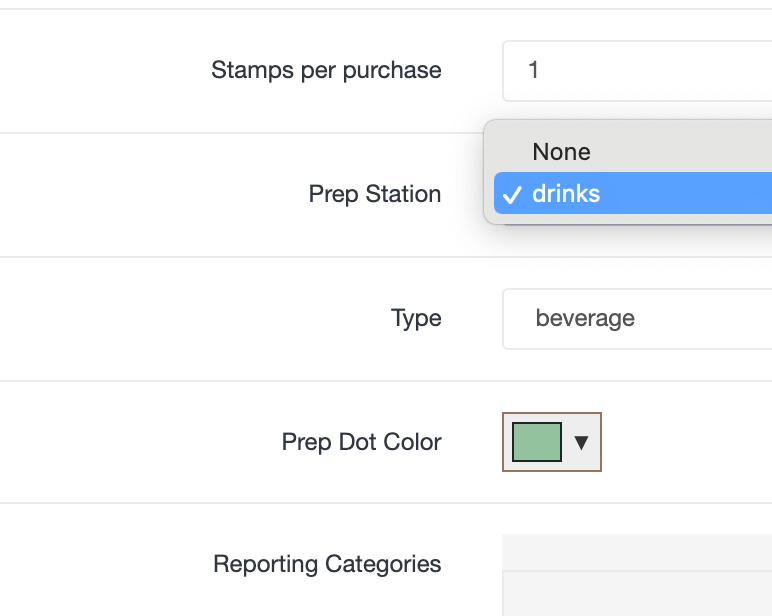
Click Edit on the Item you want to send to a specific prep stations

Select the prep station for this item.
3. Sync your menu to your store
Once you have finished updating the Prep Station for the items you want to direct to a specific station you will need to Sync your menu out to your stores. ?Remember syncing to a lab is a best practice to first verify any changes you have made.

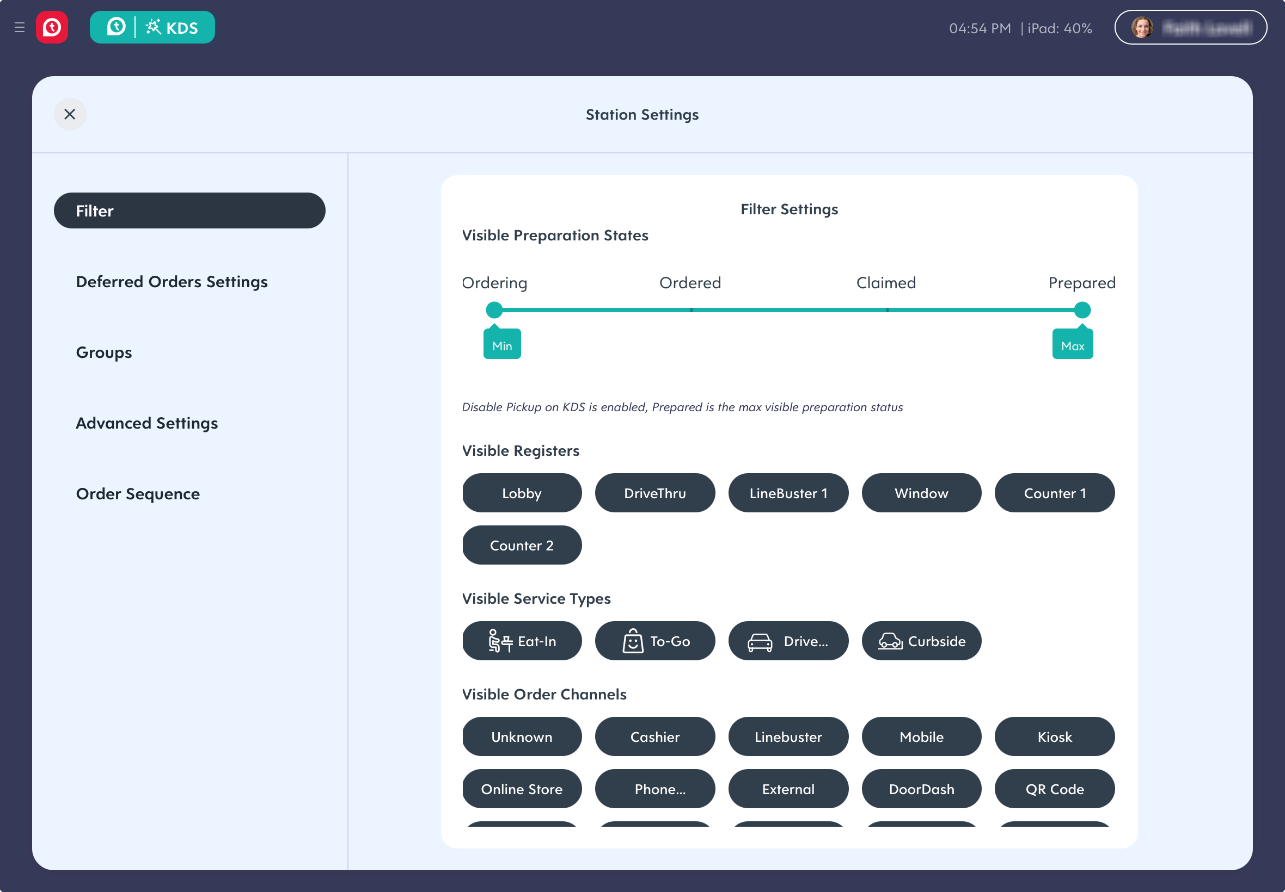
4. Configure KDS
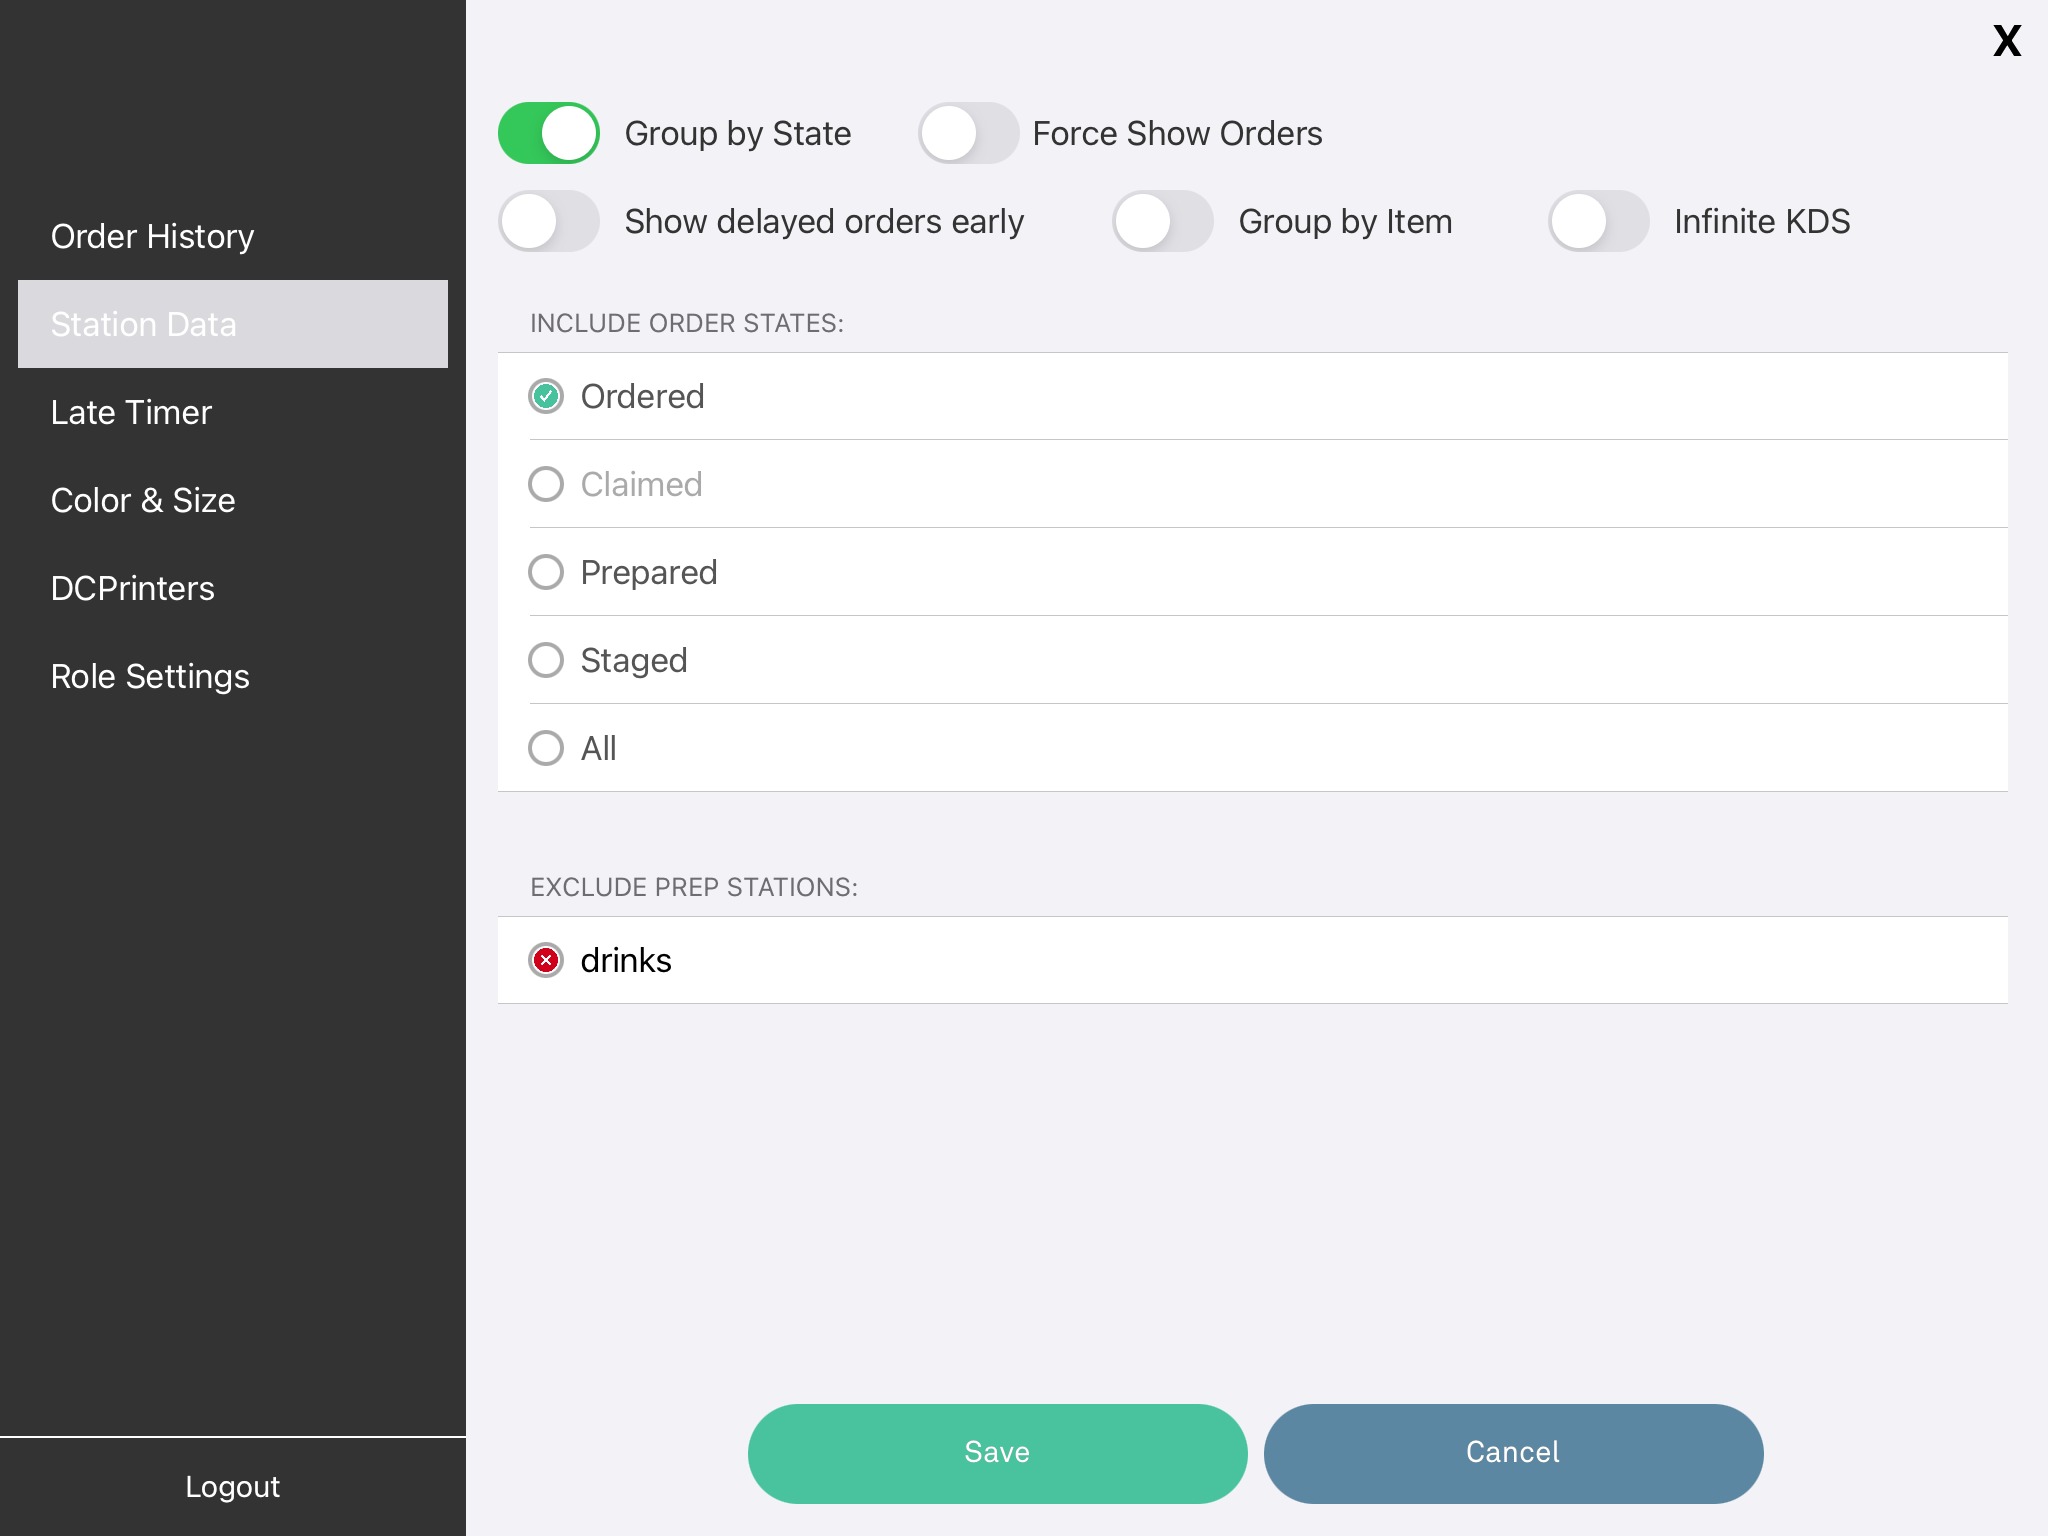
From the Hamburger Menu on your KDS go to Station Data.
?Tip: "Group by State" must be on to see this option appear.
To exclude all items going to the drinks prep station, simply tap the radio button as seen below and tap Save.
(TouchP PRO)
(TP Enterprise)
To display drinks simply deselect the Exclude Prep Stations radio button.
If you want to create a KDS that shows only drinks you will need to create multiple prep stations, e.g. food, retail, frozen, etc. following the instructions above. Then assign each item on your menu to a specific prep station, again following the steps above.
Once you have created all of your prep stations and assigned all items to your prep stations you can configure each KDS:
- exclude no prep stations = see all items
- exclude one/some prep stations = see all items except those going to a specific prep stations
- exclude all prep stations except for one = see only the items going to that prep station
In the second example below we we will add multiple prep stations.
The Main prep station will be configured to Auto Print a Prep Order ticket.
Individual menu items will be set to the Main prep station.
Whenever any of these items are ordered a Prep Order ticket will print at the printer associated with the Main prep station.
Overview - Example 2
Prep stations can be used to automatically print a ticket when an order or item reaches the KDS.
- Create one or more prep stations, e.g. hot, cold, fried
- Configure Auto Print for the prep station
- Assign items to a specific prep stations
- Sync the menu
1. Create a Prep Stations
Follow the steps in Example 1 to create a new prep station both at the HQ and store level.
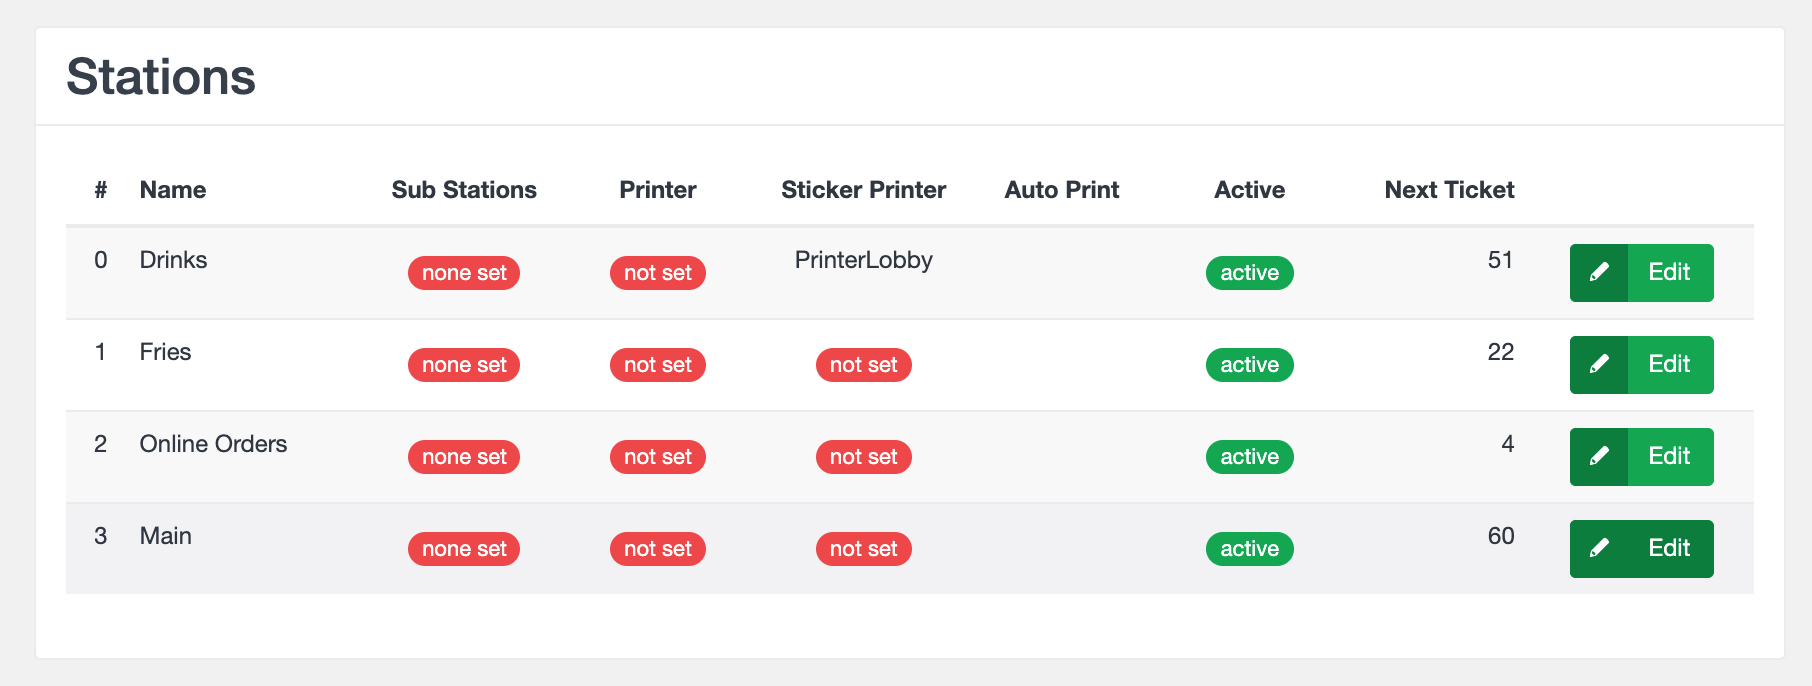
For this example we have created a total of four prep stations. This is done at the HQ level and at any live stores. All future stores will be automatically built with these prep stations.

2. Configure Auto Print for the Prep Station
Navigate to the Local Store level of the Touchpoint Web Admin to configure auto print for your newly created Prep Station.
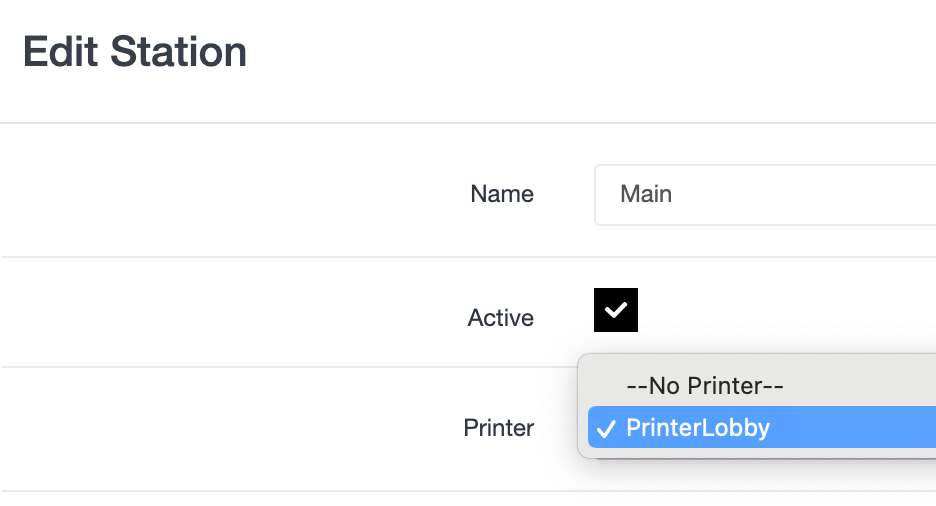
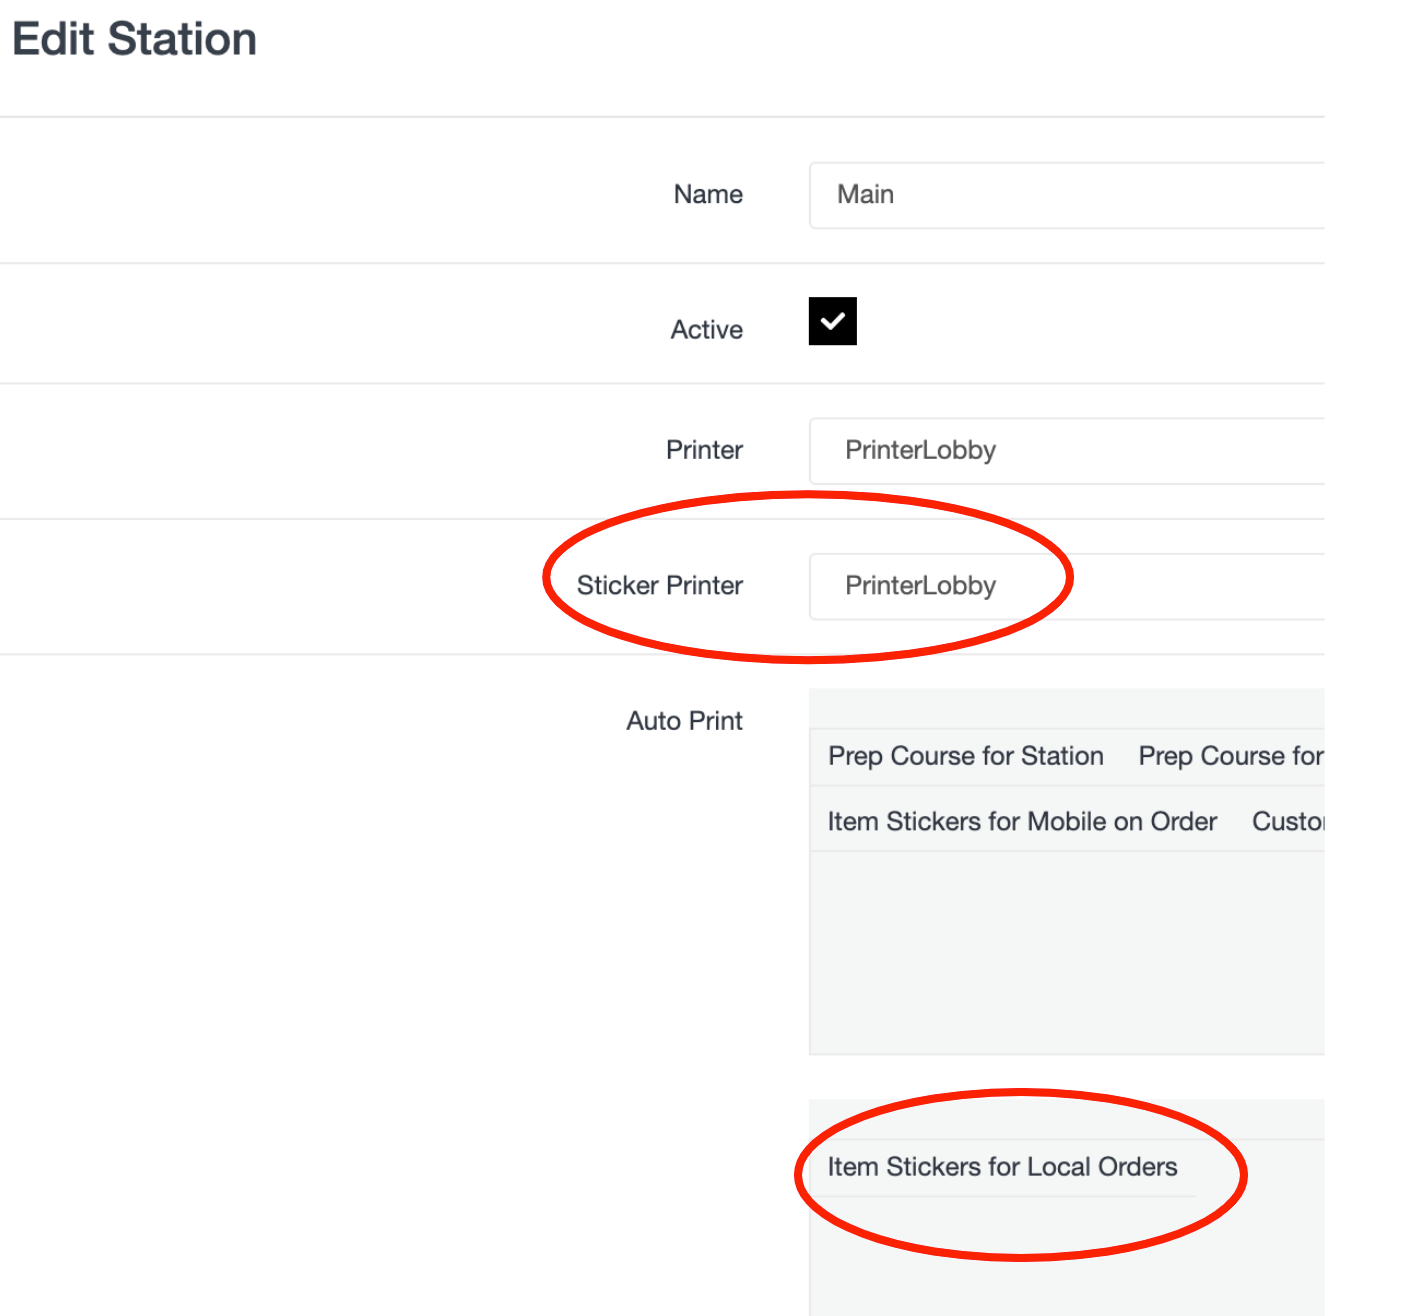
Tap edit for the Prep Station you would like to configure to auto print tickets. In this example we will select the Main prep station.
Under Printer, select the name of the printer that will be used to print these Prep Station tickets.
Click on Prep Order to make this an Active Auto Print job
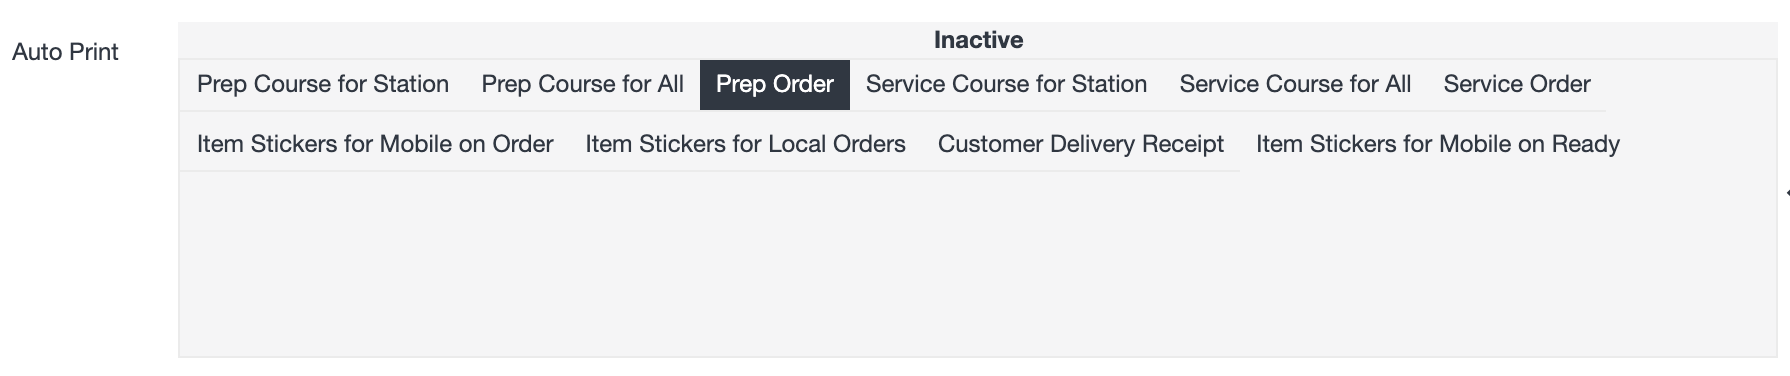

Remember to press Save

Note: Prep Order will print a full-size ticket for an order. Alternately, to print a small, sticker-sized ticket for an order simply set your printer as the Sticker Printer and click on Item Stickers for Local Orders to make this the Active Auto Print job. This will cause a small sticker-sized ticket to print once payment is completed.
3. Assign items to a specific prep stations
Follow the steps in Example 1 to assign items to the prep station you've just configured to Auto Print Prep Order tickets.
In this example you would assign items to the Main prep station as that is the prep station that is now configured to Auto Print Prep Order tickets.
4. Sync the menu
Follow the steps in Example 1 to sync the menu.
In this example, a Prep Order ticket will now print whenever an item set to the Main prep station is ordered. The Prep Order ticket prints after payment is collected for the order.
Was this article helpful?
That’s Great!
Thank you for your feedback
Sorry! We couldn't be helpful
Thank you for your feedback
Feedback sent
We appreciate your effort and will try to fix the article